| At the start of a sprint, find out what you need to test. Discussing test cases is a great way to help the team understand the detail of what your users need. Tests planned in this way provide a clear target for the test/development team. Basically following diagram shows the hierarchey of test plan in Test Manager. |
 |
1. Connect to a Team Project from Test Manager
It is required to connect TFS for accessing any pre-defined team projects. Open Microsoft test manager, then add tfs server as below; |
 |
| 2. Once project is opened, click on ‘Add’ to create a new test plan [Example: Functional Testing] |
 |
| Enter a name for new test plan as below |
 |
| 3. Click on ‘Select’ to open new test plan |
 |
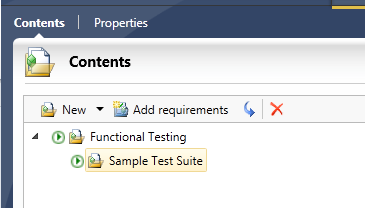
| A new window opens with the newly created test plan. Just need to consider about adding new test suites to this test plan for new functionalities. But creating test suites are not essential. |
| 4. To create test suite, right-click on the test plan and click on ‘New suite’ |
 |
| 5. Once this test suite is added, our test plan will be having below hierarchy |
 |
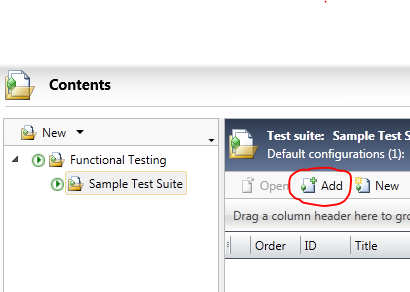
| 6. Add test cases – It is time to add test cases for our test suite. In this example I use ‘Microsoft Visual Studio Scrum 2013’ as TFS process template. Therefor my test cases will be ‘Acceptance tests’ associate with ‘Product backlog’ items (Story)For more information about process template, please read |
| http://msdn.microsoft.com/en-us/library/ms400752.aspx |
7. I would like to add a query based test case to my test suite (Sample suite).
Please follow below steps; |
| 7.1 Click on ‘Add’ to add existing test cases (as below) |
 |
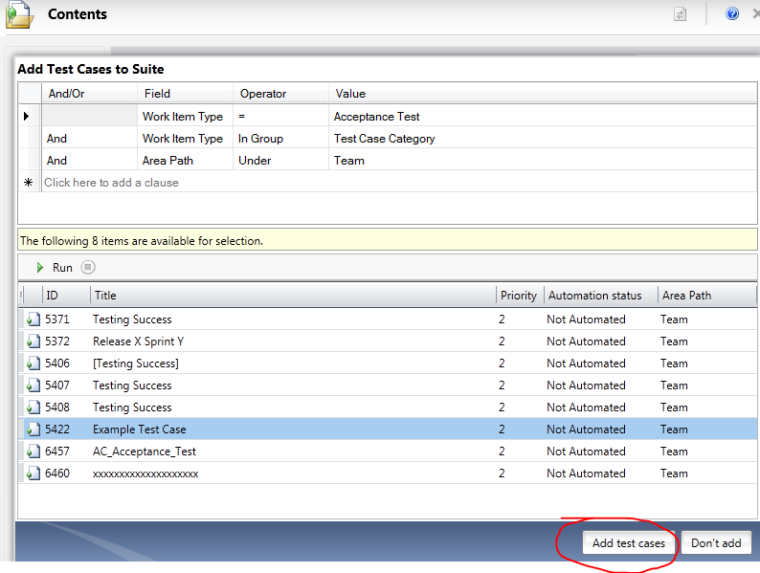
| 7.2 Click on ‘Run’ to execute the query on query window (below) |
 |
| 7.3 This query will be returned all the acceptance tests under ‘Team’ project, then select one of the test case (e.g. 5422 Example Test Case). Finally click on ‘Add test cases’ to add this test case to the test suite (see below) |
 |
| 7.4. After adding this test case to the test suite, the test plan will appears as below# |
 |
| 7.5 Now it is required to open the test case and define the test steps and expected results. To do this select test case and click on ‘Open’ |
 |
Describe the test case
In this example I am adding a sample test case to verify the addion functionality of the standard windows calculator. Therefore I can add a positive non-decimal test case to verify this functionality as follows |
 |
To Run test cases;8.Then click on ‘Test’ (top menu) to execute/run tests, |
| 9.0 Then select your test case and click on ‘Run’ to execute the test case |
 |
| 10. Click on ‘Start Test’ to run the test |
 |
| 11. Open Windows claculator parallel to Microsoft Test Manager |
| 12. Select the test step, then define the status as below |
 |
| 13. After completion of the test, click on ‘End test’, then Save and close (top-right hand coner) |
| 14. This will close the test window and display the results as below |
 |


